More than often developers test API, either through a browser request or using some clients such as
POSTMAN,
Advanced Rest Client (ARC). To expose the functionality of the API, we also tend to expose the methods and descriptions, and associated data structure through some means which requires additional work. To complement, either or both of these functionalities,
Swagger becomes handy which provides API documentation and API testing by configuration.
Swagger UI is a tool that can be used across API lifecycle. Swagger provides easy to navigate documentation and/or visualization of API resources and enables interaction with API possible from within the application itself making the development and testing effort, as well as end-user experience seamlessly smooth. In this article, I am going to discuss how to implement swagger in API and exemplify some use cases of Swagger UI. I will be using .Net Core 2.0 Web API application and using Visual Studio 2017 IDE. I have created a sample API application with a single controller and four methods as part of the demo
which is available for download.
Swagger offers the most powerful and easiest to use tools to take full advantage of the OpenAPI Specification.
Configuration
Wiring-up Swagger on an application is fairly minimal and can be accomplished in four easy steps namely - installation, import, registration, and endpoint enablement.
The package can be installed in Package Manager Console, or alternatively by going to the NuGet Package Manager menu.
Install-Package Swashbuckle.AspNetCore

|
| Figure 1: Installing Swagger in the Package Manager Console. |
Once installed, Swagger must be imported into Startup.cs.
using Swashbuckle.AspNetCore.Swagger;
Then the Swagger as service must be registered within ConfigureServices method of Startup.cs.
services.AddSwaggerGen(c =>
{
c.SwaggerDoc(_version, new Info { Title = _applicationName, Version = _version });
});
Finally, the application must enable JSON as well as UI endpoints for swagger within Configure method of Startup.cs so that end-users can interact to API methods through the Swagger UI.
// Enable Swagger JSON endpoint.
app.UseSwagger();
// Enable swagger-ui (HTML, JS, CSS, etc.)
app.UseSwaggerUI(c => {
c.SwaggerEndpoint($"/swagger/{_version}/swagger.json",${_applicationName} {_version}");
});
The complete list of Startup.cs file is shown in Snippet 1.
Snippet 1: Content of Startup.cs
Visualization
Upon completing the above four steps, swagger is ready to go. Browse through
https://localhost:5001/swagger/v1/swagger.json to get the data in JSON (either in a browser or a client such as
POSTMAN,
Advanced Rest Client (ARC)). The returned JSON object provides the specification of the REST methods (separated by Controllers) and objects used in API. An example response is Snippet 2.
Snippet 2: JSON Response Sample
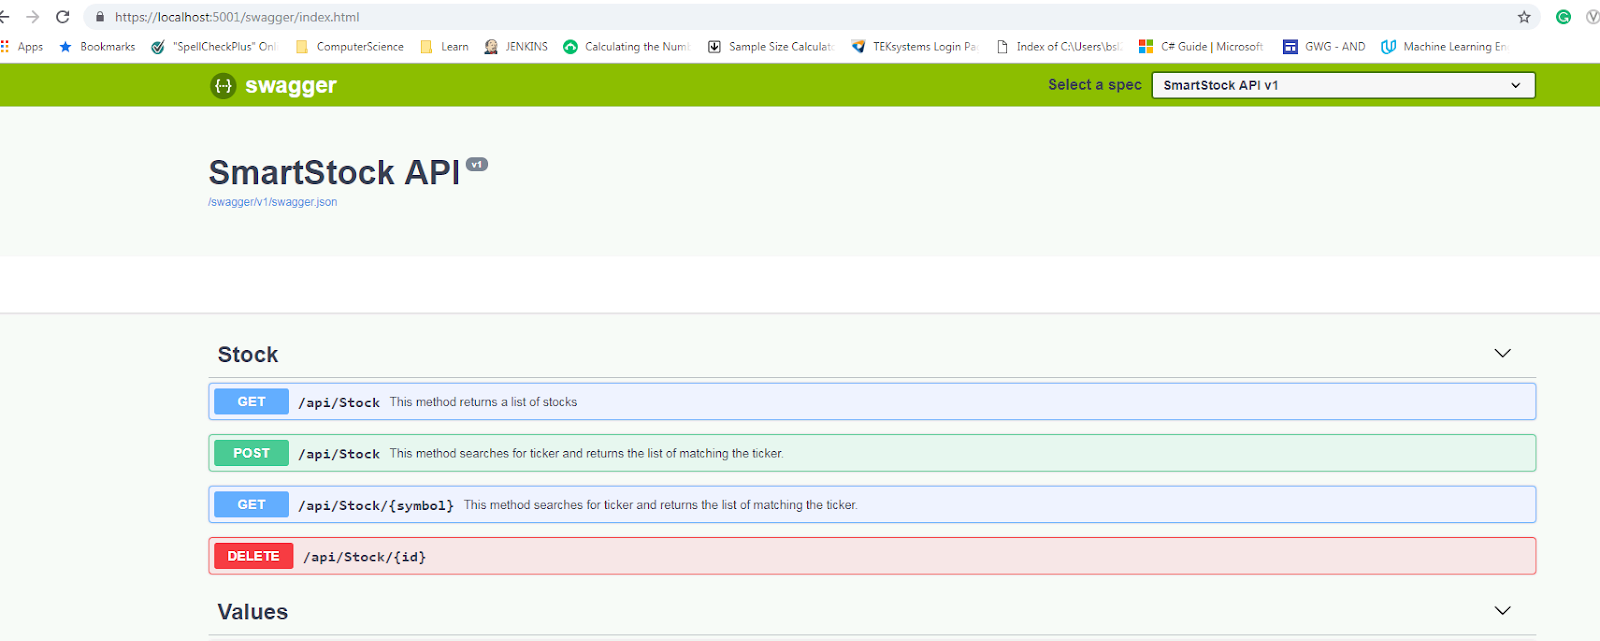
The Swagger UI is accessible by navigating to
https://localhost:5001/swagger/index.html where a user can visualize the same data that was available in JSON response in an interactive format. This UI also supports the actual execution of the rest methods.

|
| Figure 2: Visualizing API in Swagger UI |
Testing
Swagger provides functionality to test the API methods without any tools. For example, clicking the GET (first tab in Figure 2.) expands the method. By clicking 'Try it Out' and then 'Execute', swagger triggers a call to 'get' method to /api/stock. Note that there is a single controller named 'StockController' in the demo application. The results are shown in the UI which can also be downloaded. Figure 3. shows a result screen for the get method. Any method exposed in the UI can be executed in UI itself, thereby giving us the ability to test the API directly from the API itself.
 |
| Figure 3: Testing of API methods in Swagger UI |
Support to Attributes
Routing attributes, Http*attributes are supported by default. Figure 4 shows how the methods decorated with HttpGet, HttpPost, HttpDelete are reflected in the Swagger UI.

|
| Figure 4: Swagger UI reflecting HTTP attributes |
Swagger is in sync with attributes in .Net. For example, if a controller class is decorated with [Obsolete] attribute, the UI reflects the fact that the controller is 'obsolete'. Figure 5 shows that the ValuesController is marked 'Obsolete' and Swagger UI reflects the same and is not clickable. This feature becomes handy when API is phasing out certain functionality without breaking the working code.
 |
| Figure 5: Swagger UI reflecting the Obsolte attribute |
Support XML Documentation
Swagger support Documentation in UI with some configuration change. By adding following lines of code in *.csproj file, the XML document is generated.
<Property Group>
....
<GenerateDocumentationFile>true</GenerateDocumentationFile> <NoWarn>$(NoWarn);1591</NoWarn>
<Property Group>
With the following lines of code in the Startup.cs, while registering, the UI shows the XML documentation.
services.AddSwaggerGen(c => { ... var xmlFile = $"{Assembly.GetExecutingAssembly().GetName().Name}.xml"; var xmlPath = Path.Combine(AppContext.BaseDirectory, xmlFile); c.IncludeXmlComments(xmlPath);});
With the change to use XML path, the Swagger exposes the XML document in the UI.
 |
| Figure 6: Swagger UI Shows Documentation. |
Swagger is supported in all major browsers and works in both local or on the web environment. The look and feel of the UI are customizable.
I showed before how it works on a local machine. The Swagger UI works well on the cloud. The same application deployed to Azure,
https://smartstockapi.azurewebsites.net/swagger/index.html works as it worked in my local machine.
 |
| Figure 7: Swagger UI in Application Hosted in Cloud (Azure) |
Resources/Materials/References: