Sunday, October 18, 2020

Deploying an application to Azure Kubernetes Service (AKS)

Azure Kubernetes Service (AKS) manages hosted Kubernetes environment and makes it easy to manage containerize application on Azure. While the AKS makes the process quick and easier, there are a lot of parts and steps involved which makes the learning process sometimes overwhelming. Based on my own learning experience, I came up with a simple set of recipes for deploying an application into the Azure Kubernetes Service (AKS) which I am sharing through this post. The recipes demonstrates illustrates how to set up a development environment, containerize an application using Docker, save the image to Azure Container Registry (ACR) and finally deploy an image from registry to an Azure Kubernetes Service (AKS) cluster. Since this recipe includes interaction with Azure, some familiarity with Azure is essential. Likewise, to test out the code and example mentioned, a valid Azure account and subscriptionn is necessary. 

(a)    Set up development environment for Azure Kubernetes Service (AKS) deployment

This step illustrates the preparation of AKS service. This demonstrates setting up a windows machine to work with Docker, Kubernetes and Azure. 

(b)    Create a Docker image of an application

This step involves using a java application and dockerize (or containerize) the application. Essentially steps to create a Docker image is described. Topic includes building the code, dockerfile and docker image. 

Images can also be created by modifying the existing container. This appraoch is useful when one needs to reuse existing container and/or for incremental updates. For more information, please visit Creating, Modifying and Updating Docker Image from Container for the appraoch.

(c)     Deploy an application image to Kubernetes

In this step the focus is at deploying an application to a local Kubernetes cluster. Interacting with Kubernetes Command Line Interface (Cli) and monitoring the cluster is demonstrated as well. 

(d)    Store image to the Azure Container Registry (ACR)

In this step, the deployment to Azure is demonstrated. The process discussed how to store an image to Azure Container Registry. This sets the stage and requirements for deploying the application to the Azure in the next stage. Since this involves interacting with Azure some familiarity of Azure is needed and a valid account with Azure is necessary to go through the sample.

(e)    Deploy application image to Azure Kubernetes Service (AKS) 

In this step, deployment of an application to Azure Kubernetes Service (AKS), using a docker image stored in the Azure Container Registry (ACR). 

In the steps outlined above, I demonstrate how to build and execute docker image, use container registry and use Kubernetes cluster in local machine and in the Azure cloud to run the application. 


Deploy application to Azure Kubernetes Service (AKS)

In this post, I will be discussing how to deploy an application from an Azure Container Registry (ACR) to Azure Kubernetes Service (AKS). The recipe for storing applicaiton image to ACR is discussed in  Storing image to the Azure Container Registry (ACR). This post is part of the Azure Kubernetes Service (AKS) Deployment Recipes

The first step to deploy application to AKS is to get Azure Service Principal. When I use Azure command line interface (CLI) interactively (such as from PowerShell), I am actually using my credentials to login to the azure and then interact with the Azure services. For applications, I could register am application in Azure AD, i.e., create identity for an application or a service principal. Thus a service principal is identity of application similar to a user. I can create such a service principal with the Az ad sp create-for-rbac command. 


It may take few seconds to complete the request and azure should return with the identity information of the created service principal which I will note down for later use as appId and password will be used authenticate the service with Azure in the later steps.

{
  "appId": "e36d80f2-3462-402d-9782-81144978dc03",
  "displayName": "azure-cli-2020-10-18-19-37-49",
  "name": "http://azure-cli-2020-10-18-19-37-49",
  "password": "o0Ryfiy5dyaeF~KgKY8-PMA_VcfkEwc.3K",
  "tenant": "fc0b9234-6aeb-43f8-9e70-5a4ee6dc849a"
}

To access the stored images from the ACR, I must grant AKS service principal the necessary rights. I will get the id of the ACR resource and store this into variable $acrId = az acr show -n livestreaming --resource-group livestreaming --query "id" -o tsv 

Next, I intend to grant the reader role to the AKS cluster with Az role assignment create --assignee “e36d80f2-3462-402d-9782-81144978dc03” --role Reader --scope $acrId using the id of the service principal I had created earlier.


Since I have now added a role to Service Principal, I created earlier any application with the service principal can get the image from the ACR. Next, I am going to create AKS cluster by specifying a name of ‘livestreaming”, into resource group of “livestreaming”, and desired node count of 1. I am also instructing Azure to generate ssh keys and by specifying id and password of the Service Principal that I created earlier.

Az aks create --name livestreaming --resource-group livestreaming --node-count 1 --generate-ssh-keys --service-principal "e36d80f2-3462-402d-9782-81144978dc03" --client-secret  "o0Ryfiy5dyaeF~KgKY8-PMA_VcfkEwc.3K

It may take a few seconds to complete at which time my cluster has been created and deployed. Now I am ready to use AKS using kubectl cli. First, I am going to get the AKS credentials by specifying name and resource group which both in my case is ‘livestreaming’.

az aks get-credentials --name livestreaming -g livestreaming

Now if I peek into the Kubernetes cluster’s config running into my local machine, I can see find the reference of the AKS cluster in my config using the following command:

cat C:\users\benktesh\.kube\config | sls "livestreaming"

 I can now verify that the node is running in the AKS by trying to find the nodes using kubectl get nodes which returns a single node named “aks-nodepool1-11912651-vmss000000” confirming the AKS cluster.


Now that the cluster is ready, I can deploy the application to the AKS.
 Now let’s modify the Kube.yml file to and modify the following elements and save the yml file:
  • Change the image name to reflect the login server livestreaming.azurecr.io/livesreaming:v1. The details of the login server can be obtained by executing az acr list -g livestreaming -o table command.
  • Change the service type as ‘LoadBalancer’ from ‘NodePort’

The above changes will ensure that the image is pulled from the ACR and request to the application is routed through a load balancer.

With these changes I can deploy using the kubectl apply command that I used to deploy the application to local AKS cluster using the steps described  Deploying to Kubernetes

The above changes will ensure that the image is pulled from the ACR and request to the application is routed through a load balancer.  With these changes I can deploy using the kubectl apply command that I used to deploy the application to local AKS cluster in the article. I am going to run kubectl apply -f Kube.yml to deploy the application to the AKS and then run kubectl get svc to get the list of services. 


The External IP for the deployed application will be available after which I can browse to my application in the AKS. When I browse to the external IP listed for the service, I can see my application's user interface. This confirms that I ahve successfully deployed my application to the AKS. 


Reference and further reading

Set up development environment for Azure Kubernetes Service (AKS) deployment

Create a Docker image of an application

Deploy an application image to Kubernetes

Store image to the Azure Container Registry (ACR)


Store image to the Azure Container Registry (ACR)

Once the application is built, compiled and tested; and an application image is created and is verified to work on Kubernetes, the step to the AKS route is to store the application image to a container repository so that the image can be shared with others and accessible from any location for additional work. DockerHub and Azure Container Repository(ACR) are common examples of container registries. Since the focus of the post is Azure Kubernetes Service (AKS), I will illustrate the use of the ACR for repository. An Azure Container Registry is a Docker registry in the Azure cloud that can be used to store docker images. The ACR can be created in Azure portal as well using command line interface. 

This post is part of the post that discusses Azure Kubernetes Service (AKS) Deployment Recepes. I have discussed about how to setup development envionment in Set up development environment, and how to create docker image using a sample application in Create a Docker Image of an Application and the corresponding code can be downloaded from https://github.com/benktesh/LiveStreaming/tree/learnAKS. I also discussed verification of the deployment of sample application into local Kubernetes cluster in Deplyoing an application to Kubernetes. In this post, I am going to use a docker image and deploy the image to a local Kubernetes cluster. I will also illustrate how to interact with Kubectl - a command line interface of kubernetes. 

Interacting with Azure

In order to use Azure Container Registry (ACR), I need to have a valid account and subscription in the Azure. Once can visit Azure and create an account if needed.  

In order for me to interact with Azure remotely using PowerShell, I have to install Azure Cli. The instruction for installing Azure Cli is availabe at Install Azure CLI on Windows. To verify the status of Azure cli, I can run Az version command in the PowerShell window. 

I can login to Azure using Az login, which opens a browser to interactively login to Azure and upon successful login, the command window is populated with a message and list of subscriptions. 

Azure command az account list --output table can be used to list all the subscription. az account set --subscription [subscription id] command can be used to select a software where 'subscription' is the id of subscription. az account show --output table shows the currently selected account information.

Now that I have set the account and subscription, I am going to start creating a resource group named 'livestreaming' and in the 'eastus' locations.

Az group create -n livestreaming -l eastus

I intend put all the resources created under this resource. This appraoch helps me manage the resources better. The next step is to create and use the Azure Container Registry (ACR).

Azure Container Registry (ACR)

Command az acr create -n livestreaming -g livestreaming -l eastus --sku basic is used to create an Azure Container Registry named as 'livetreaming' in the resource group 'livestreaming' and in location eastus with a basic tier.


I can log into the created container using az acr login -n livestreaming

Once successfully logged in to the ACR, executing az acr list --output table  command displays the details of the acr. I am making a note of the login server information which currently is 'livestreaming.azurecr.io' and tag the docker image with the login server name and a version such as v1. This step helps me deploy the image to the ACR later.  

docker tag livestreaming:local livestreaming.azurecr.io/livestreaming:v1

With the above command, I added a tagged source livestreaming.local to 'livestreaming.azurecr.io/livestreaming:v1'.


Now I am all set to push the image to container registry by running a docker push command as below:

docker push livestreaming.azurecr.io/livestreaming:v1

Once the process is completed, I can verify the existence of image in the ACR by running the following azure command to list the respository items which shows the existence of livestreaming registery:

az acr repository list -n livestreaming -o table


Summary

In this recipe, I demonstrated how to interact with Azure and create container registry and use Docker to push a docker image to azure container registry using the . The process can be summarized as below:  
  • Log In to azure
  • Create resource group azure
  • Create container registry in the azure
  • Log-in to container registry
  • Tag the image to be eligible for azure container registry
  • Push the image to the container registry

Thursday, October 15, 2020

Deploying an application to the Kubernetes cluster

Once the application is built, compiled and tested and image is created, the next step to AKS route is to verify the application in Kubernetes. This post is part of the post that discusses Deploying an application to Azure Kubernetes Service (AKS). I have discussed about how to setup development envionrment and creating docker image of an applicatoin the posts respecitvely. In this post, I am going to use a docker image that I created usingt he process desceribed in and deploy this to Kubernetes. I will also illustrate how to interact with Kubectl - a command line interface of kubernetes. 

The post refers to an application and corresponding docker image that was created using the instruction given in the post Dockering an Application and the corresponding code can be downloaded from https://github.com/benktesh/LiveStreaming/tree/learnAKS.

The pre-requisite is that the system already consins docker with Kubernetes support intalled. I can check the version of kubernetes by running Kubectl version --short in the powershell windows.

Sometimes it is handy to use alias for kubectl. Alias can be created using set-alias -name k -value kubectl in powershell. This command enable user to use k instead of kubectl to execute kubernetes command. Note that alias can only be used in interative mode. 

The image below shows the execution of version --short command using kubectl as all as alias. 


Application to the kubernetes can be deployed primarily in two different ways namely, interactively and declaratively. I am going to go over each of the steps quickly. The difference between interactive deployment and declaractive deployment is analogous to difference in executing multiple commands one at a time versus running a batch of command. But never-the-less interactive deployment is helpful in understanding the steps that goes into effect. 

Interactive Deployment 

Interactive deployment takes a serries of command where each command does specific action. The actions and commands are described below:

a. Create a deployment named 'livestreaming-deployment' for the image 'livestream' with tag 'local'. 

    Kubectl create deployment livestreaming-deployment --image=livestreaming:local 

The above command, creates a deployment which can be verified by

Kubectl get deployment

The powershell window shows that deployment named 'livestreaming-deployment' is created. 

b. Run a deployment named 'livestreaming-deployment' on port 8888 which will create pod.

kubectl run livestreaming-deployment --image=livestreaming:local --port=8888

c.Expose the deployment

kubectl expose deployment livestreaming-deployment --type=NodePort --port=9999


Command start microsfot-edge:http://localhost:31644 opens the Edge browser from within the powershell command line.

The result of creation of deployment, running the pods and exposing the pods are the three steps to run application in the kubernetes cluster. In the image above, the application is running at port 31644 of the localhost which is mapped to the 9999 port of the container where applicaiton is hosted. Note that the host name is the name of deployment which verifies that the applicatio is indeed hosted in local kubernetes cluster. 

Now we can delete the deployment and services by issuing
kubectl delete deployment livestreaming-deployment  and kubectl delete service livestreaming-service respectively to delete the depoloyment and service that was created.  

Declarative Deployment

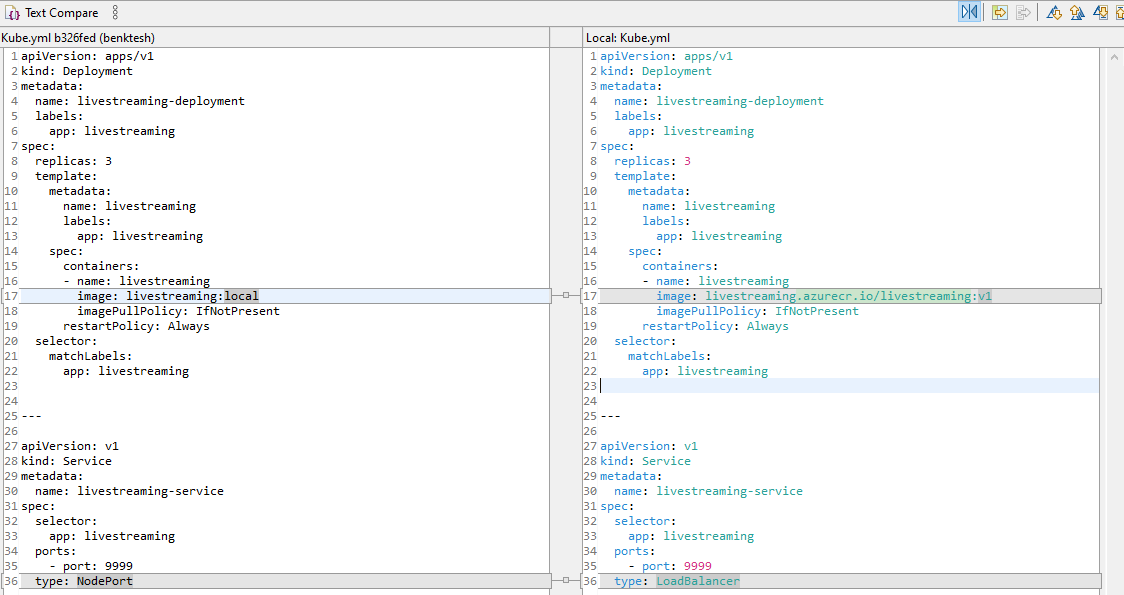
In this method, the instructions are scripted in YAMLor json file. Here I am going to use a yml file. The file is named Kube.yml which is avialble in the application code repository. The content of the file is as shown below:

apiVersion: app/v1
kind: Deployment
metadata:
  name: livestreaming-deployment
  labels:
    app: livestreaming
spec:
  replicas: 3
  template:
    metadata:
      name: livestreaming
      labels:
        app: livestreaming
    spec:
      containers:
      - name: livestreaming
        image: livestreaming:local
        imagePullPolicy: IfNotPresent
      restartPolicy: Always
  selector:
    matchLabels:
      app: livestreaming
 
---
 
apiVersion: v1
kind: Service
metadata:
  name: livestreaming-service
spec:
  selector:
    app: livestreaming
  ports:
    - port: 9999
type: NodePort

a

Therea are two sections in the file. First it is about the container specification where among other things, I am specifying the name of deployment as livestreaming-deployment, and image as livestreaming:local to mark the same docker image I had used before. and defining desired replicas to 3. The next part is the definiton of service with name as 'livestreaming-service'. Essentially, the yml file includes all the statements that I used when creating the deployment interactively. 

With the yml file in place, I can go to powershell window run create command with file option.

Kubectl create -f Kube.yml

The above command will read the instructions from the Kube.yml file and create deployment and expose the service. This can be verified by looking at the services (i.e. using Kubectl get svc) and opening up the browser and navigating to the url:port exposed by Kubernetes for livestreaming-serive.


The deployment file is handy in tearing down the deployment. For example, simply running 

                                                Kubectl delete -f Kube.yml  

will delete all the resources created from this file. 

In this post, I demonstrated two ways to deploy a dockerized application or docker image to local kubernetes cluster. In the next post of the series, I will discuss how to Store image to the Azure Container Registry (ACR).


Reference and further reading

Set up development environment for Azure Kubernetes Service (AKS) deployment

Create a Docker image of an application

Store image to the Azure Container Registry (ACR)

Deploy application image to Azure Kubernetes Service (AKS) 


Tuesday, October 13, 2020

Create Docker image of an application

Creating a docker image is an important step towards containerizing the application and to successfully running the application in the Kubernetes. This post is part of the post that discusses Deploying an application to Azure Kubernetes Service (AKS)In this post, I am going to use a sample java application, and illustrate the steps to create image that can be used for AKS deployment. I will be using windows PowerShell command. 

Images can also be created by modifying the existing container. This appraoch is useful when one needs to reuse existing container and/or for incremental updates. For more information, please visit Creating, Modifying and Updating Docker Image from Container for the appraoch.

For the purpose of this post, 'dockerizing' is the process of creating a docker image of the application which is what containerizing or make container is. Dockerizing sounds intuitive (to me personally). In this post I am using an application named ‘LiveStreaming’ which essentially is a webserver which takes user files and saves it in the server for further processing and returns the name of the file that was successfully received at the server. The application simply stores the file in the root folder. The sample application is a maven project, and the name of the project is ‘LiveStreaming’. The application is configured to listen to port 9999. 

When the application is run in local machine, browsing to http://localhost:9999 opens up page for file upload.


Once user clicks the 'Choose file' button, a dialog is opened to select a file.


When user uploads the file, a successfully received message is returned to the user. 


The idea is that this is going be a livestreaming server (eventually). I have a learnAKS branch create for this article can be accessed from https://github.com/benktesh/LiveStreaming/tree/learnAKS.

Above I described basic flow of the application that works on local machine with a hostname that is shown in the upload UI and the application is running at port 9999. 

Now back to code, upon cloning the project, I would want to ensure that the application can be run as maven project. I am using Eclipse, but any other IDE should equally work.  As a quick test, I am going to run the mvn clean compile command from Windows Powershell (PS) while at the root of the application folder to observe that application can be compiled which can be verified by 'Build Sucess' notification.  


Dockerizing or creating docker image can be achieved in many ways. I prefer to declarative statements and would like to reuse the existing build process as much as possible. With this notion, I am going to add a Dockerfile to an existing project and achieve the dockerizing an application. Alternatively, dockerzation can be achieved by using plugins in the Maven build process which is not currently in the scope of this post. The image below shows the list of files and folder in the application root. 


The content of the dockerfile is shown below. 

FROM maven:3.6.3-jdk-8 AS MAVEN_TOOL_CHAIN

COPY pom.xml /tmp/

COPY src /tmp/src/

WORKDIR /tmp/

RUN mvn clean package


FROM openjdk:8

COPY --from=MAVEN_TOOL_CHAIN /tmp/target/LiveStreaming-1.0-SNAPSHOT-jar-with-dependencies.jar /LiveStreaming-1.0-SNAPSHOT.jar

       CMD ["java", "-jar", "/LiveStreaming-1.0-SNAPSHOT.jar"]

Content of the docker is as shown above. This file is also included in the github code that I mentioned earlier. The docker process simply copies the resources and calls mvn clean package command to build the code to create a self-contained jar then calls the command to create image.

In order for this to work, I had added 'maven-assembly-plugin' plugin to package a jar and specified the mainClass attribute in the pom.xml.

<plugin>
  <artifactId>maven-assembly-plugin</artifactId>
  <executions>
    <execution>
          <phase>package</phase>
          <goals
            <goal>single</goal>
          </goals>
    </execution>
  </executions>
  <configuration>
    <archive>
      <manifest>
       <mainClass>Main.Bootstrap</mainClass>
      </manifest>
    </archive>
    <descriptorRefs>
      <descriptorRef>jar-with-dependencies</descriptorRef>
    </descriptorRefs>
  </configuration>
</plugin>

Now back to terminal, while still pointing at the root of the application, I can run docker build command. Before I run a build command, I am currently at the  as below:

docker build -t  livestreaming:local .

In the command above, I am instructing docker to execute the commands listed in the Dockerfile to create an image named ‘livestraming’ with tag ‘local’ and place them at root of the container as noted by ‘.’ (character dot in the command).

Note that the application is at ..\LiveStreaming folder and my command windows is pointing to that location. The folder contains Dockerfile and note that this does not have any extension. Docker recognizes this file by its name.


The result of the build is the creation of docker image this can be verified by going exploring images in the Docker for Desktop as shown in the figure below:


The built image can be run within docker with the following command:

docker run -d -p 8080:9999 livestreaming:local 

The argument -d instructs docker to run as daemon process and -p instructs port mapping from local to container (host:container format). In this example, I am mapping port 8080 of host to the 9999 port of the image. Thus, when I run the application, I can use 8080 port of the machine hosting the docker and the application will still be listening to port 9999 internally. When the command is executed, the application must be running at localhost:8080. Lets open up a browser and navigate to the url and port where the livestreaming app is running by executing the following PS command:

start microsoft-edge:http://localhost:8080

In the window, I am going to upload the Scratch.py file as I did before.


We can see the same interface as seen while the application was running in the local machine directly at port 9999. Note the hostname is displaying the container id which is different than when the application was run locally and showing the name of the computer. The list of images and their status can be seen by running docker ps command.


The ports column shows which port of the host is mapped to the port of the container among other things. Existing image can be stopped or started using docker stop [id] command. 

Sometimes, it is necessary to peek into the container which can be done by executing the following command:

docker exec -it 00622c0645fb /bin/bash

The execution of the above command gives us the shell access which I can execute ls -all  command to see the content where it shows that Scratch.py file is also in the root of the folder. 


docker container kill $(docker ps -q) can be used to remove all the containers. 

With the steps above I demonstrated how to create a docker image of an application and run the image on a windows machine. 


Reference and further reading

Set up development environment for Azure Kubernetes Service (AKS) deployment

Deploy an application image to Kubernetes

Store image to the Azure Container Registry (ACR)

Deploy application image to Azure Kubernetes Service (AKS) 

Creating, Modifying and Updating Docker Image from Container


Sunday, October 11, 2020

Set up development environment for Azure Kubernetes Service (AKS) deployment

This article is part of the series  Deploying an app to Azure Kubernetes Service (AKS). In this article I am going over the set up steps to prepare for deploying an application to Azure Kubernetes Service (AKS) clusters.  

I am using Windows 10 Enterprise. I have Hyper-V installed in the system. Some of the components must already be present in Windows system. 

I have installed the stable release of Docker for windows edge edition so that I can use Kubernetes for orchestration. The installation media can be obtained from Docker Hub

Once installed docker, ensure the WSL 2 is also installed by executing the following in powershell window running as admin:  


Enable-WindowsOptionalFeature -Online -FeatureName $("VirtualMachinePlatform", "Microsoft-Windows-Subsystem-Linux")


This may require computer restart and after that Docker should already be running, if not start the Docker for Windows. 


In the setting of Docker Desktop, check ‘Enable Kubernetes’ and check ‘Deploy Docker Stacks to Kubernetes by default’. 

Azure Cli is used to interact with AKS clusters. Since I am going to interact with Azure, I must also have Azure Cli installed in my machine. Instruction to install Azure cli is at https://docs.microsoft.com/en-us/cli/azure/install-azure-cli. I can verify the Azure Cli machine by executing the following command in the PowerShell window: 

az --version | select -First 1


Reference and further reading

Create a Docker image of an application

Deploy an application image to Kubernetes

Store image to the Azure Container Registry (ACR)

Deploy application image to Azure Kubernetes Service (AKS)