Creating a docker image is an important step towards containerizing the application and to successfully running the application in the Kubernetes. This post is part of the post that discusses Deploying an application to Azure Kubernetes Service (AKS). In this post, I am going to use a sample java application, and illustrate the steps to create image that can be used for AKS deployment. I will be using windows PowerShell command.
Images can also be created by modifying the existing container. This appraoch is useful when one needs to reuse existing container and/or for incremental updates. For more information, please visit Creating, Modifying and Updating Docker Image from Container for the appraoch.For the purpose of this post, 'dockerizing' is the process of creating a docker image of the application which is what containerizing or make container is. Dockerizing sounds intuitive (to me personally). In this post I am using an application named ‘LiveStreaming’ which essentially is a webserver which takes user files and saves it in the server for further processing and returns the name of the file that was successfully received at the server. The application simply stores the file in the root folder. The sample application is a maven project, and the name of the project is ‘LiveStreaming’. The application is configured to listen to port 9999.
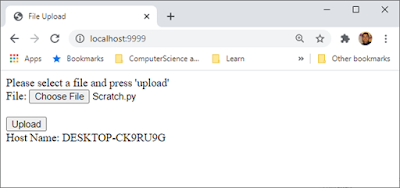
When the application is run in local machine, browsing to http://localhost:9999 opens up page for file upload.
The idea is that this is going be a livestreaming server (eventually). I have a learnAKS branch create for this article can be accessed from https://github.com/benktesh/LiveStreaming/tree/learnAKS.
FROM maven:3.6.3-jdk-8 AS MAVEN_TOOL_CHAIN
COPY pom.xml /tmp/
COPY src /tmp/src/
WORKDIR /tmp/
RUN mvn clean package
FROM openjdk:8
COPY --from=MAVEN_TOOL_CHAIN
/tmp/target/LiveStreaming-1.0-SNAPSHOT-jar-with-dependencies.jar
/LiveStreaming-1.0-SNAPSHOT.jar
<artifactId>maven-assembly-plugin</artifactId>
<executions>
<execution>
<phase>package</phase>
<goals>
</goals>
</execution>
</executions>
<configuration>
<archive>
<manifest>
<mainClass>Main.Bootstrap</mainClass>
</manifest>
</archive>
<descriptorRefs>
<descriptorRef>jar-with-dependencies</descriptorRef>
</descriptorRefs>
</configuration>
</plugin>
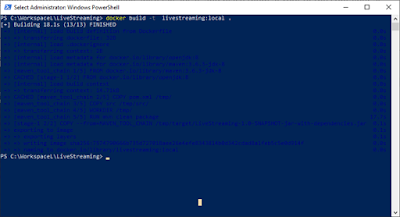
Note that the application is at ..\LiveStreaming folder and
my command windows is pointing to that location. The folder contains Dockerfile
and note that this does not have any extension. Docker recognizes this
file by its name.
The result of the build is the creation of docker image this can be verified by going exploring images in the Docker for Desktop as shown in the figure below:
The built image can be run within docker with the following command:
docker run -d -p 8080:9999 livestreaming:local
The argument -d instructs docker to run as daemon process and -p instructs port mapping from local to container (host:container format). In this example, I am mapping port 8080 of host to the 9999 port of the image. Thus, when I run the application, I can use 8080 port of the machine hosting the docker and the application will still be listening to port 9999 internally. When the command is executed, the application must be running at localhost:8080. Lets open up a browser and navigate to the url and port where the livestreaming app is running by executing the following PS command:
start microsoft-edge:http://localhost:8080
In the window, I am going to upload the Scratch.py file as I did before.
We can see the same interface as seen while the application was running in the local machine directly at port 9999. Note the hostname is displaying the container id which is different than when the application was run locally and showing the name of the computer. The list of images and their status can be seen by running docker ps command.
The ports column shows which port of the host is mapped to the port of the container among other things. Existing image can be stopped or started using docker stop [id] command.
Sometimes, it is necessary to peek into the container which can be done by executing the following command:
docker exec -it 00622c0645fb /bin/bash
The execution of the above command gives us the shell access which I can execute ls -all command to see the content where it shows that Scratch.py file is also in the root of the folder.
With the steps above I demonstrated how to create a docker image of an application and run the image on a windows machine.
Reference and further reading
Set up development environment for Azure Kubernetes Service (AKS) deployment
Deploy an application image to Kubernetes
Store image to the Azure Container Registry (ACR)
Deploy application image to Azure Kubernetes Service (AKS)
Creating, Modifying and Updating Docker Image from Container


Thank for Given the Good Information
ReplyDeleteArtistixe have a rich experience of developing Cryptocurrency Wallet for different fintech applications.