Once the application is built, compiled and tested and image is created, the next step to AKS route is to verify the application in Kubernetes. This post is part of the post that discusses Deploying an application to Azure Kubernetes Service (AKS). I have discussed about how to setup development envionrment and creating docker image of an applicatoin the posts respecitvely. In this post, I am going to use a docker image that I created usingt he process desceribed in and deploy this to Kubernetes. I will also illustrate how to interact with Kubectl - a command line interface of kubernetes.
The post refers to an application and corresponding docker image that was created using the instruction given in the post Dockering an Application and the corresponding code can be downloaded from https://github.com/benktesh/LiveStreaming/tree/learnAKS.
The pre-requisite is that the system already consins docker with Kubernetes support intalled. I can check the version of kubernetes by running Kubectl version --short in the powershell windows.
Sometimes it is handy to use alias for kubectl. Alias can be created using set-alias -name k -value kubectl in powershell. This command enable user to use k instead of kubectl to execute kubernetes command. Note that alias can only be used in interative mode.
The image below shows the execution of version --short command using kubectl as all as alias.
Application to the kubernetes can be deployed primarily in two different ways namely, interactively and declaratively. I am going to go over each of the steps quickly. The difference between interactive deployment and declaractive deployment is analogous to difference in executing multiple commands one at a time versus running a batch of command. But never-the-less interactive deployment is helpful in understanding the steps that goes into effect.
Interactive Deployment
Interactive deployment takes a serries of command where each command does specific action. The actions and commands are described below:
a. Create a deployment named 'livestreaming-deployment' for the image 'livestream' with tag 'local'.
Kubectl
create deployment livestreaming-deployment --image=livestreaming:local
The above command, creates a deployment which can be verified by
Kubectl get deployment
The powershell window shows that deployment named 'livestreaming-deployment' is created.
b. Run a deployment named 'livestreaming-deployment' on port 8888 which will create pod.
kubectl run livestreaming-deployment --image=livestreaming:local --port=8888
c.Expose the deployment
kubectl expose deployment livestreaming-deployment --type=NodePort --port=9999
Command start microsfot-edge:http://localhost:31644 opens the Edge browser from within the powershell command line.
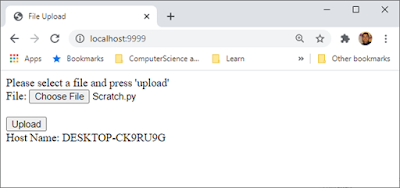
The result of creation of deployment, running the pods and exposing the pods are the three steps to run application in the kubernetes cluster. In the image above, the application is running at port 31644 of the localhost which is mapped to the 9999 port of the container where applicaiton is hosted. Note that the host name is the name of deployment which verifies that the applicatio is indeed hosted in local kubernetes cluster.
Now we can delete the deployment and services by issuing
kubectl delete deployment livestreaming-deployment and kubectl delete service livestreaming-service respectively to delete the depoloyment and service that was created.
Declarative Deployment
In this method, the instructions are scripted in YAMLor json file. Here I am going to use a yml file. The file is named Kube.yml which is avialble in the application code repository. The content of the file is as shown below:
apiVersion: app/v1
kind: Deployment
metadata:
name: livestreaming-deployment
labels:
app: livestreaming
spec:
replicas: 3
template:
metadata:
name: livestreaming
labels:
app: livestreaming
spec:
containers:
- name: livestreaming
image: livestreaming:local
imagePullPolicy: IfNotPresent
restartPolicy: Always
selector:
matchLabels:
app: livestreaming
---
apiVersion: v1
kind: Service
metadata:
name: livestreaming-service
spec:
selector:
app: livestreaming
ports:
- port: 9999
type: NodePort
a
Therea are two sections in the file. First it is about the container specification where among other things, I am specifying the name of deployment as livestreaming-deployment, and image as livestreaming:local to mark the same docker image I had used before. and defining desired replicas to 3. The next part is the definiton of service with name as 'livestreaming-service'. Essentially, the yml file includes all the statements that I used when creating the deployment interactively.
With the yml file in place, I can go to powershell window run create command with file option.
Kubectl create -f Kube.yml
The above command will read the instructions from the Kube.yml file and create deployment and expose the service. This can be verified by looking at the services (i.e. using Kubectl get svc) and opening up the browser and navigating to the url:port exposed by Kubernetes for livestreaming-serive.
The deployment file is handy in tearing down the deployment. For example, simply running
Kubectl delete -f Kube.yml
will delete all the resources created from this file.
In this post, I demonstrated two ways to deploy a dockerized application or docker image to local kubernetes cluster. In the next post of the series, I will discuss how to Store image to the Azure Container Registry (ACR).
Reference and further reading
Set up development environment for Azure Kubernetes Service (AKS) deployment
Create a Docker image of an application
Store image to the Azure Container Registry (ACR)
Deploy application image to Azure Kubernetes Service (AKS)


